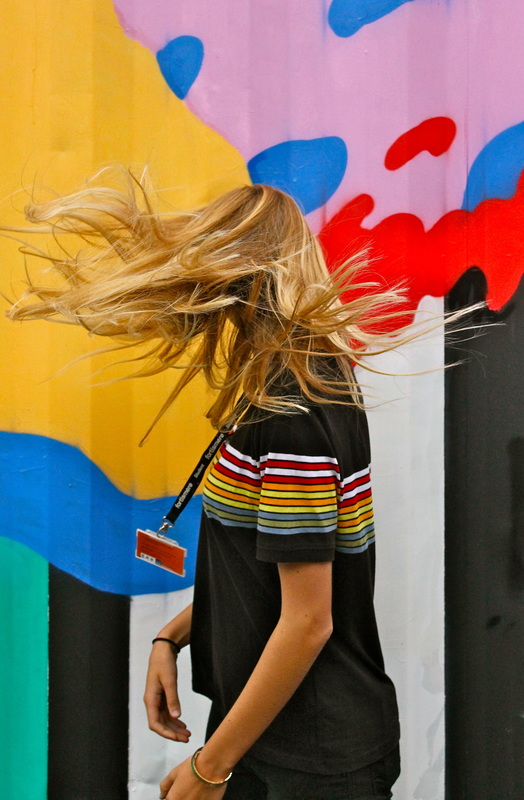
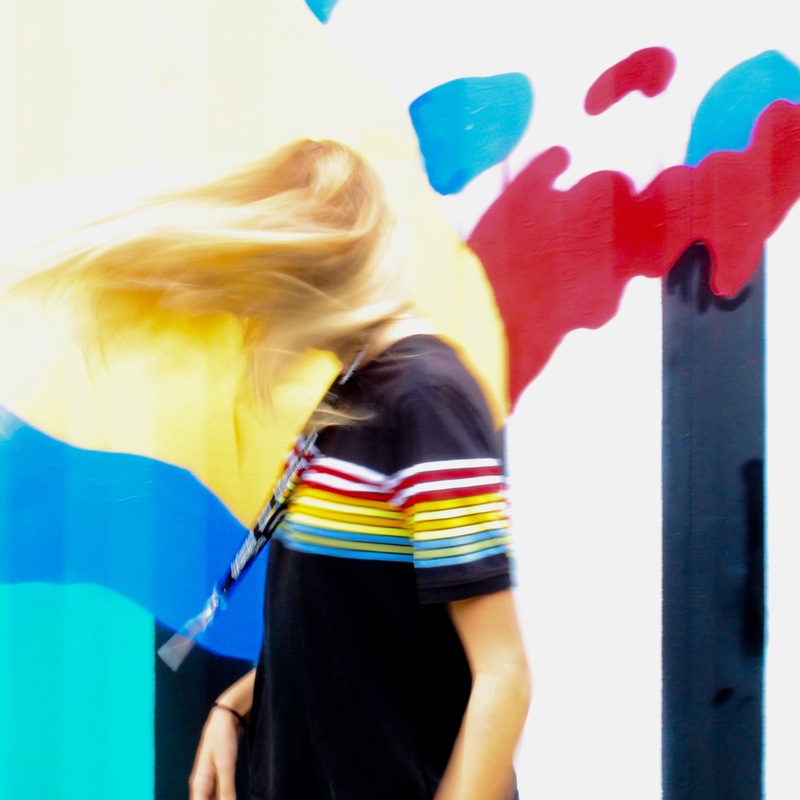
FIRST TASK
#blacklivesmatter
|
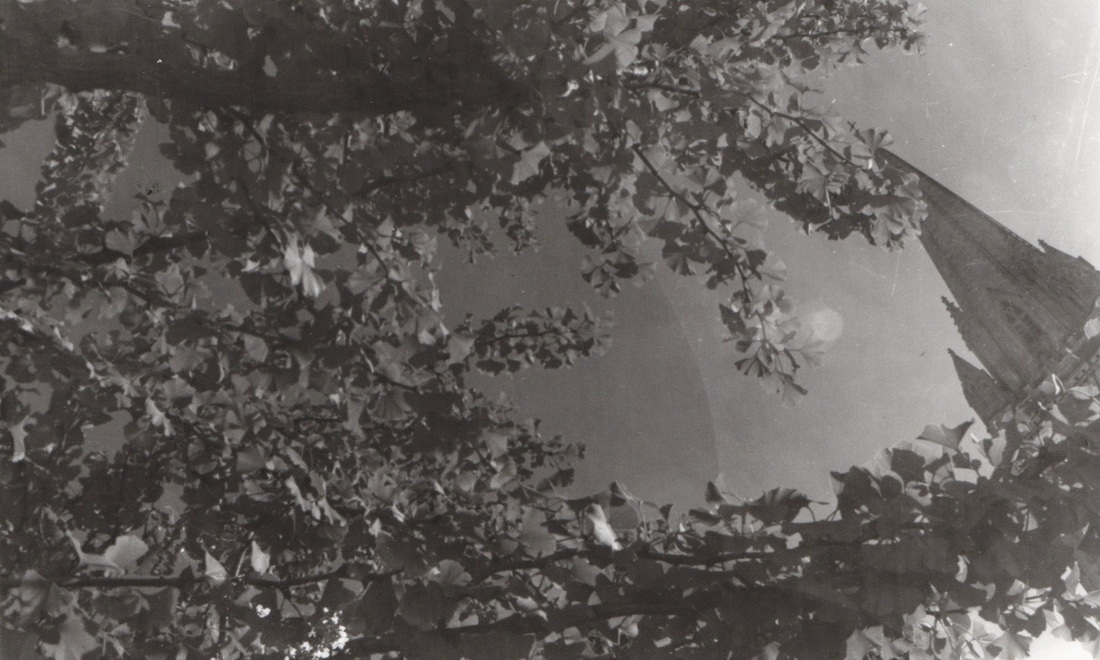
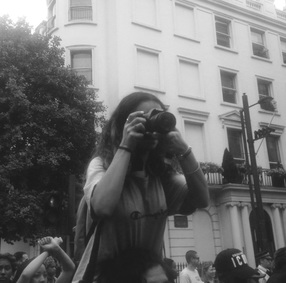
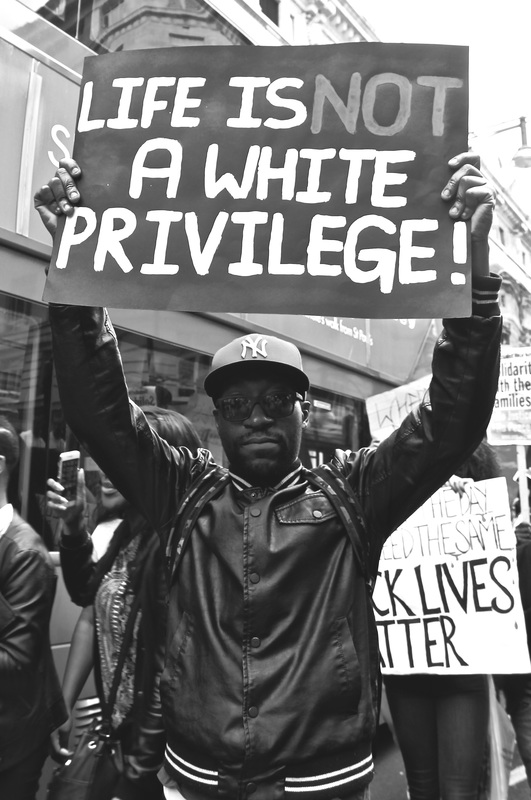
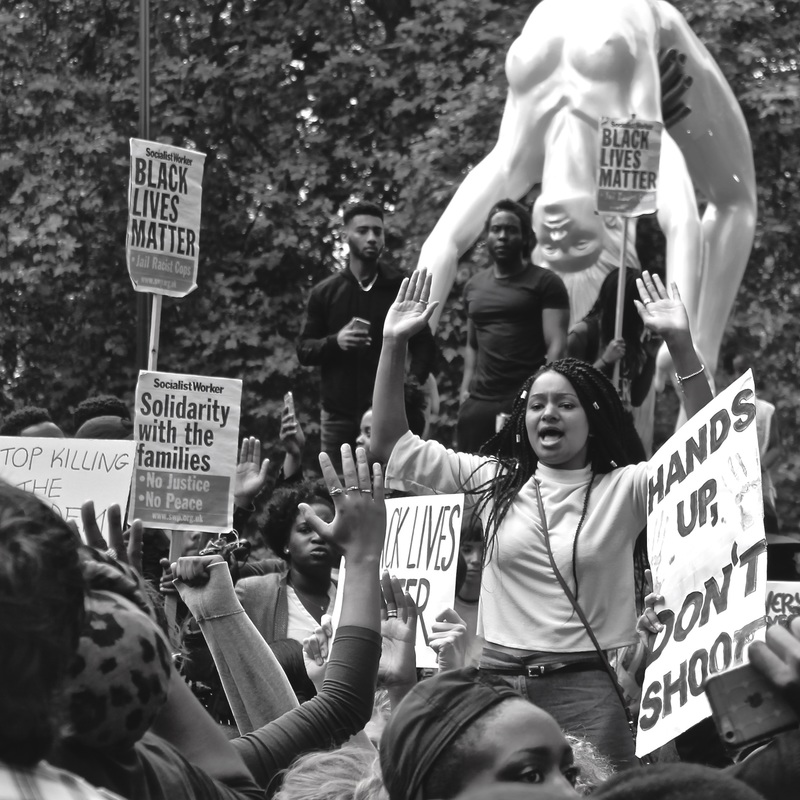
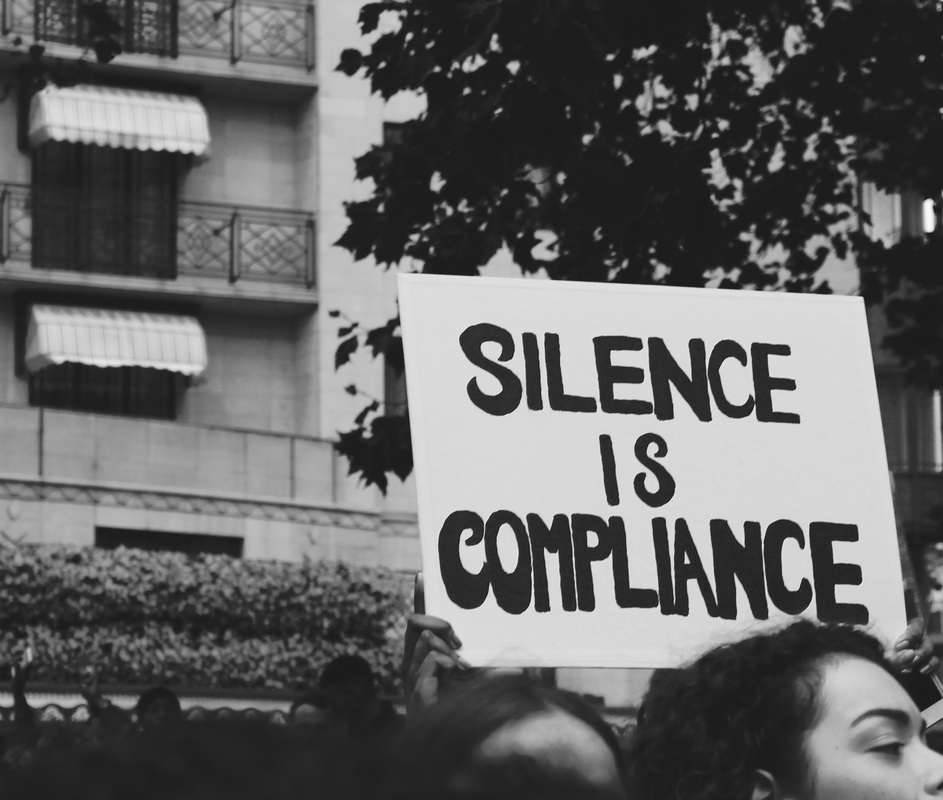
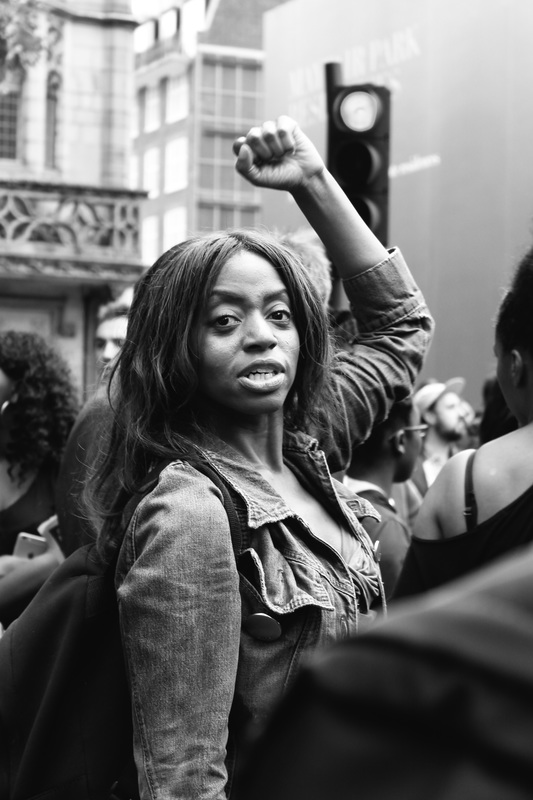
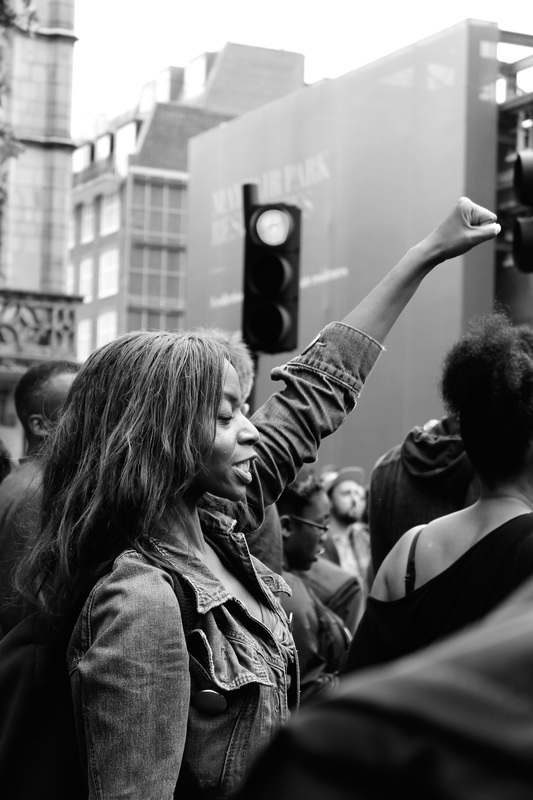
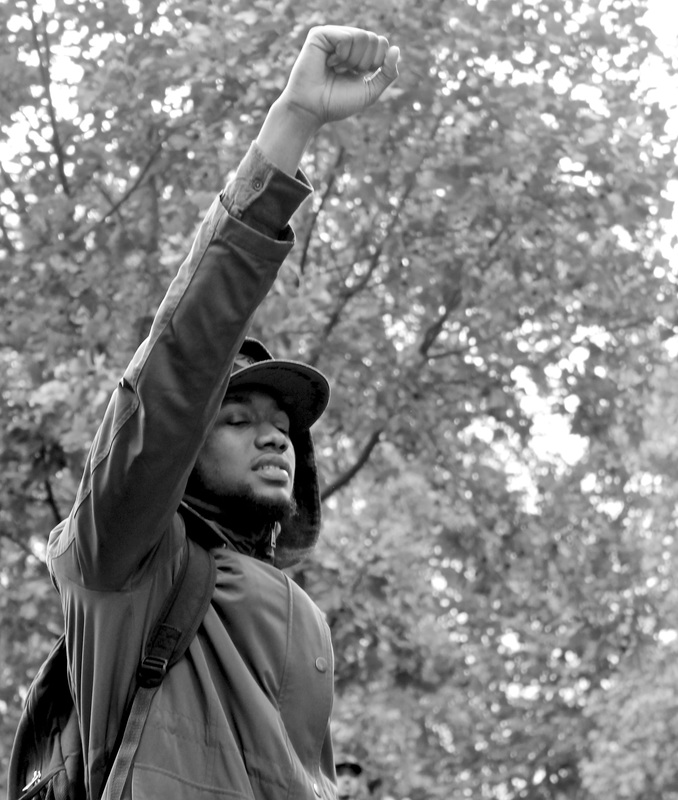
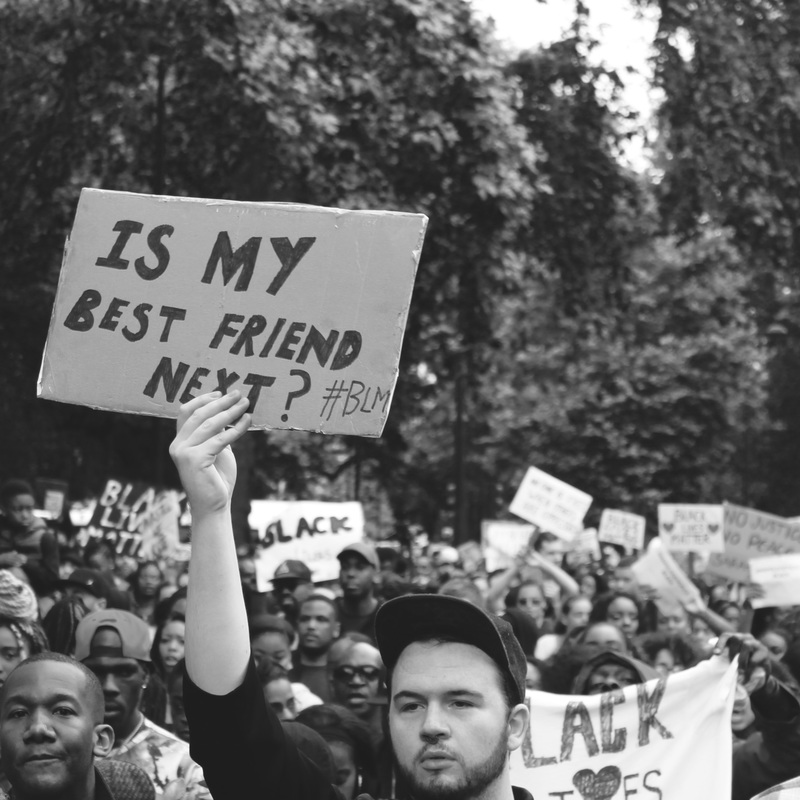
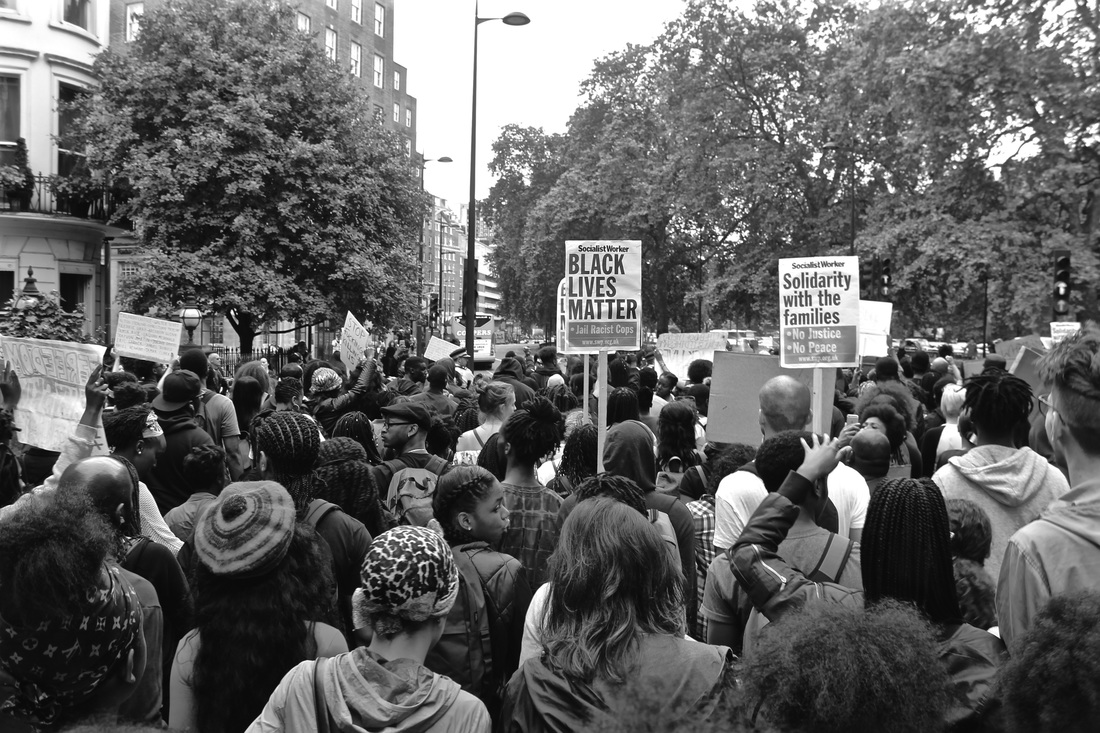
For this task I've taken a range of photos of something I really care about. My friends and I went to a black lives matter protest and I decided to take my camera and capture some of the things I saw. Last year police killed 102 unarmed black people in America. This fact is so frustrating as it reveals how quickly so many innocent people have been tragically killed. Being black myself it pains me to think people just like me are being killed just because of the colour of their skin. Consequently, this issue needs to be addressed. More people need to speak up about it or express their views any way they can, to raise awareness and inform others on this pressing issue. Otherwise things will just be left to get worse, and more fathers, mothers, friends, siblings, collogues will be robbed from their love ones. Finally, I have chosen to express my feelings and fight this cause through the means of photography, below are the ten best photos I took that day. |

|
|

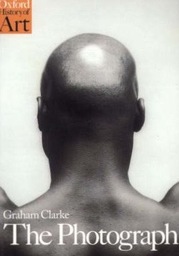
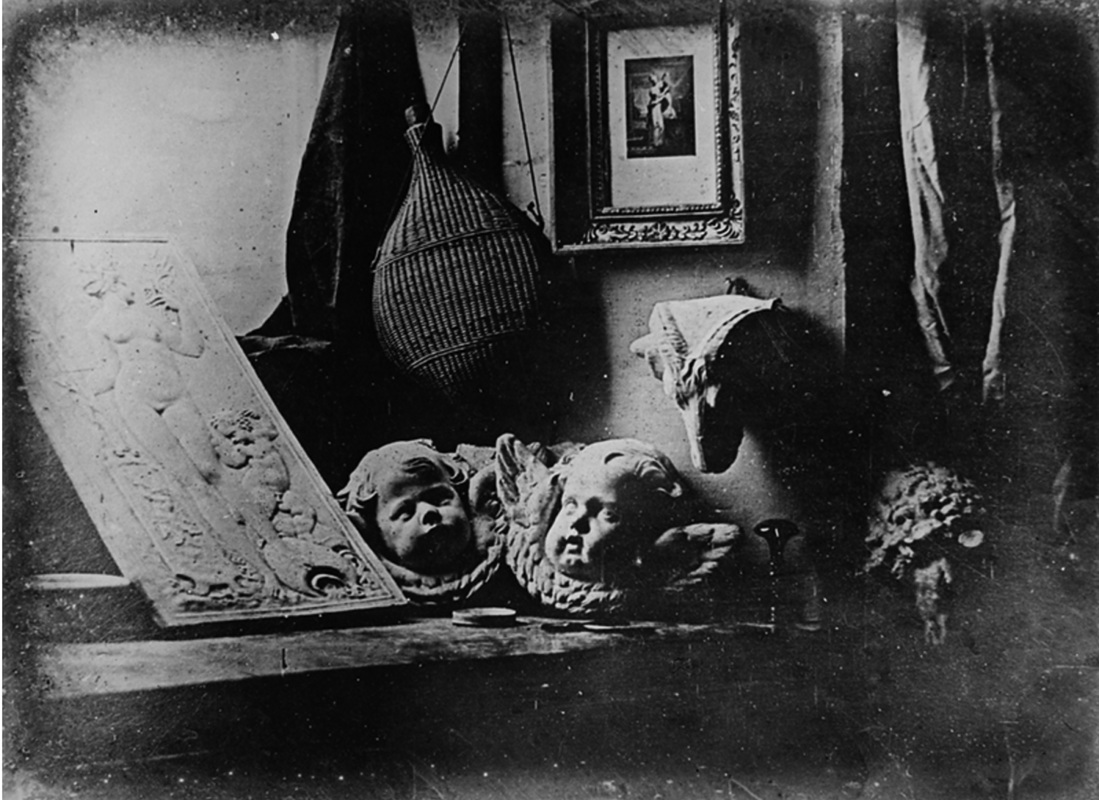
The Photograph - Graham Clarke (chapter one)
|
The first chapter of The Photograph Clarke describes photography as "A door way to the world.' He claims that photographers "see into the life of things." I have picked out these two quotes from the first chapter as I think they reveal a lot about photography. I agree with Clarke in a sense that capturing photographs allows you to explore the world in a whole new perspective. Clarke often writes about "the way we order out world." This is interesting as Clarke picks out elements such as framing and lighting, and narrates that the way we alter these settings reflects the way we see the world in which we live in. For example when Clarke is talking about framing, he says "Entire cities are reduced to 6X4 inches" This suggests how much of the world we can show in just one single image, which I believe to be quite powerful. |
HISTORY OF PHOTOGRAPHY
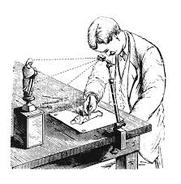
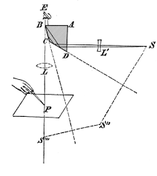
Camera Obscura and Camera Lucida
|
|
|
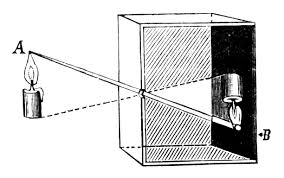
The camera obscura was an instrument invented to assist photographers in the mission to achieve the perfect perspective. Invented by Alhazen the camera obscura works by projecting an inverted image onto a surface in a dark room or space. In the 16th century the brightness and clarity of the camera obscura was upgraded by enlarging the hole in the camera and inserting a telescope lens. In the 17th century the camera obscura was revamped and became a portable device, therefore making it more practical.
The camera lucida was invented by William Hyde Wollaston in 1807 it is an optical device that is considered more controllable and portable then the camera obscura. Also no image is projected with the camera lucida, it works by the artist looking down at what they are drawing but their eyes will see a reflection by a mirror however they will be looking at their drawing surface at the same time. Consequently it appears that the object is on the paper.
"I kept looking for lenses and people would say where is all the equipment? I want to demonstrate that actually the only piece of equipment it is, is a piece of glass." - David Hockney
France and England

The Daguerreotype was invented by the Louis Jacques Daguerre, in 1839 the French government bought the Daguerreotype and released it to the world. A Daguerreotype was a detailed monochromatic print onto a metal plate. Although, France had some competition as an English scientist called William Henry Fox Talbot invented the calotype, which produced a negative, but these could be turned into positive prints by printing contact printing onto another sheet of paper. At the time the Dagurreotype was more popular as it was deemed to be more accurate and more precise , however now we can acknowledge the Calotype is more efficient as it can reproduce photos. Over the years the Calotype has been vastly improved and people still use it today.
The 19th Century and The Industrial Revolution
The Industrial revolution brought about many new inventors, who began to experiment more. Not only did more artists come about, access to new materials also meant more experimentation. In addition to this the Industrial revolution also led to a wider range of chemicals being used. During this time the first coloured photograph was taken and also the first photoshop style editing took place when the face of Abraham Lincoln was placed on a more noble looking body. Also, the first handheld camera was invented during the Industrial Revolution by George Eastman. In 1888 the first handheld camera 'The Kodak' went on sale. It came with a 20 foot roll of paper, which was 100 2.5 -inch diameter circular pictures once you finished the roll of paper you would send them back to the factory for processing and reloading .In 1889 kodak started selling rolls of film and stop producing paper.
Photograms
To make a photogram you place an array of objects directly onto photographic paper and expose it to light. The areas that recieve no light because they were blocked by objects will appear white, but the rest of the paper should turn black.
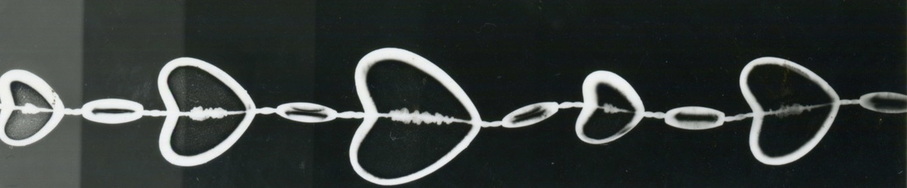
Test Strips
In class we started off by making a test strip to determine what was the best exposure time to use when making our actual photograms. We did this by taking a piece of black card and gradually moving horizontally across out photogram to expose a fraction of our photogram to the light one second at a time. This meant our test strips featured a range of different coloured backgrounds. In conclusion my test strip reveals 5 seconds was the best exposure time to use.
In class we started off by making a test strip to determine what was the best exposure time to use when making our actual photograms. We did this by taking a piece of black card and gradually moving horizontally across out photogram to expose a fraction of our photogram to the light one second at a time. This meant our test strips featured a range of different coloured backgrounds. In conclusion my test strip reveals 5 seconds was the best exposure time to use.
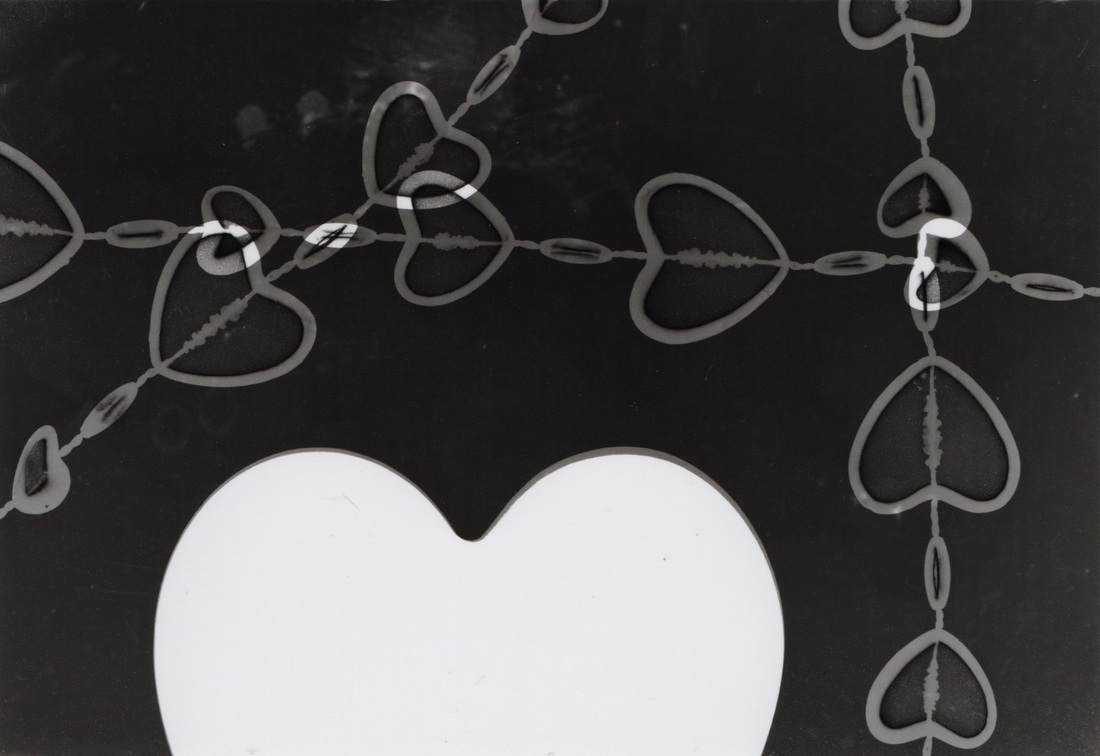
Initial response

Second response
The photogram on the left is a double exposure photogram. It was created by setting up a normal composition for my photogram. Then I set the light timer for 3 seconds and exposed my image. Then I re-arranged the objects so that they would over-lap after the second exposure. Then I exposed my image to the light for another 3 seconds. This created the overlapping effect of the beads in the image.
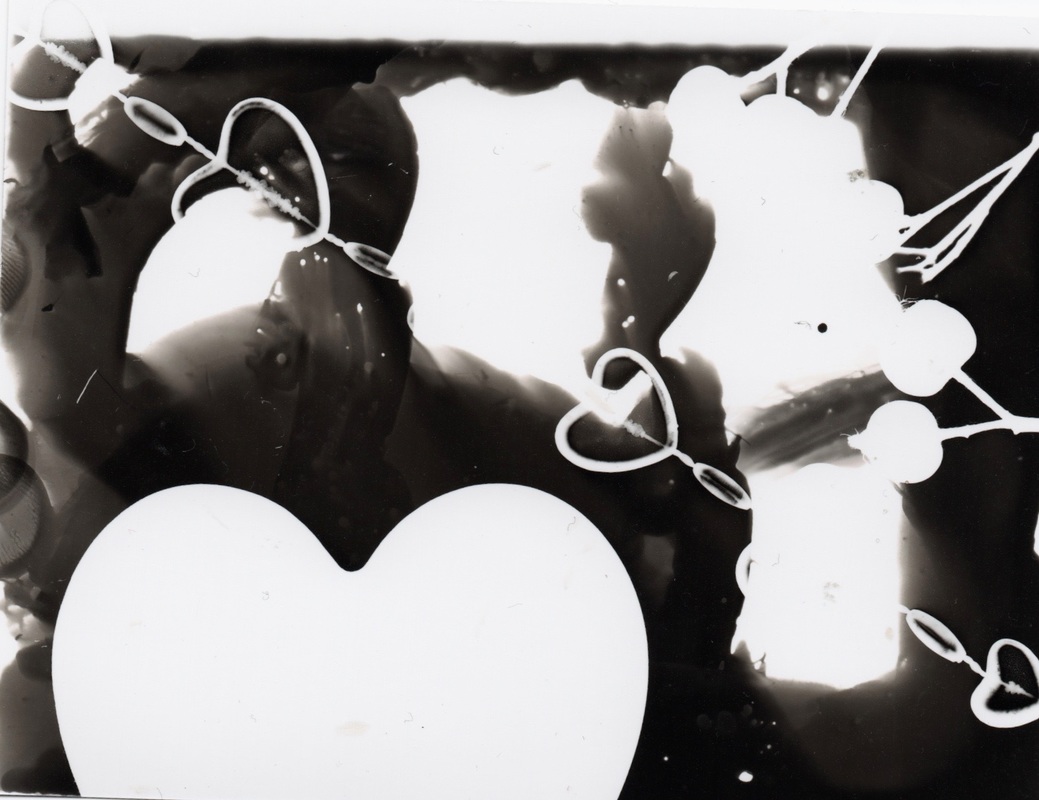
The Photogram in the middle was made by placing an array of objects on the photographic paper and exposing it to light for around 3 seconds, this time however we placed out images in the developer and immediately took them out as we began to see our photograms develop. As soon as we saw our objects emerge we would expose them again to light for another 3 seconds. This is called solarisation, it allows the objects in the image to appear darker, and have a more grey sharper outline.
The photogram on the rightwas created by again placing my objects where I wanted them to be on the photographic paper, and then exposing the image for 5 seconds. However instead of putting the photogram straight into the developer we took paintbrushes and dipped them into the chemicals and painted the developer onto out photograms where we wanted out objects to show. This made out photograms look less refined and more abstract. It appears like there is more going on as I painted the developer very randomly consequently my image looks very chaotic.

The Pinhole camera
The pinhole camera is a camera made without a lens, it is a lightproof box which features a tiny aperture. Light passes through the aperture and projects an inverted image on the photographic paper inside. In class we made our own pinhole cameras by firstly, taking a small box and light proofing it with black tape. Next we cut out a 1cm X 1cm square hole on one side of the box. We then placed tin foil in the inside of the box to cover the square hole. Next, we pierced a small hole in the tin foil using a pin, this would become out 'lens'. After we created the boxes we would go into the dark room and place photographic paper into out pinhole cameras and put the lid back on the box. We would then find a scene or subject we wanted to capture and we would reveal the aperture to it for around 3 seconds. After this we would go back to the dark room and place out photographs in developer to see what we had taken. To turn our negative images into positive ones we had to make sandwich prints. You this by placing the negative on top of photographic paper, and then put printing glass on top of that. Next you expose this with the enlargers and you will create a positive pinhole image.
RESULTS

The SLR camera
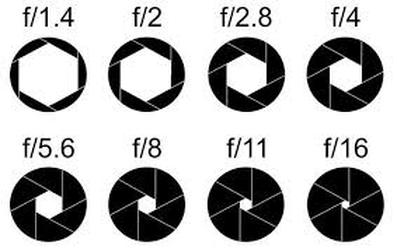
APERTURE
|
The aperture controls the amount of light that enters the camera, depending on what f-stop you set your camera on will have an effect on the focal range in your photograph this is also known as the depth of field. The smaller your f-stop the wider the opening will be, therefore this will allow more light to enter the camera. This is is useful when capturing images in dark spaces. This means the higher your f-stop the smaller your opening which means less light will enter your camera lens. This is more useful in very bright settings.. |
|
My response

SHUTTER SPEED
The shutter speed is the amount of time the camera shutter is open, it is measured in seconds or in fractions of a seconds. A fast shutter speed will freeze the action you are capturing, however a slow shutter speed will the blur the motion.
EXAMPLE


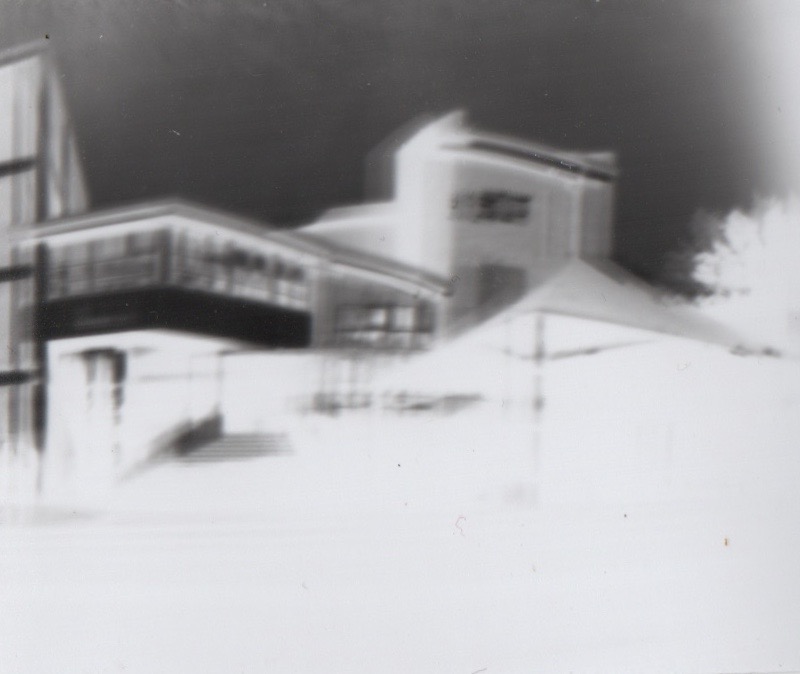
The Film Camera
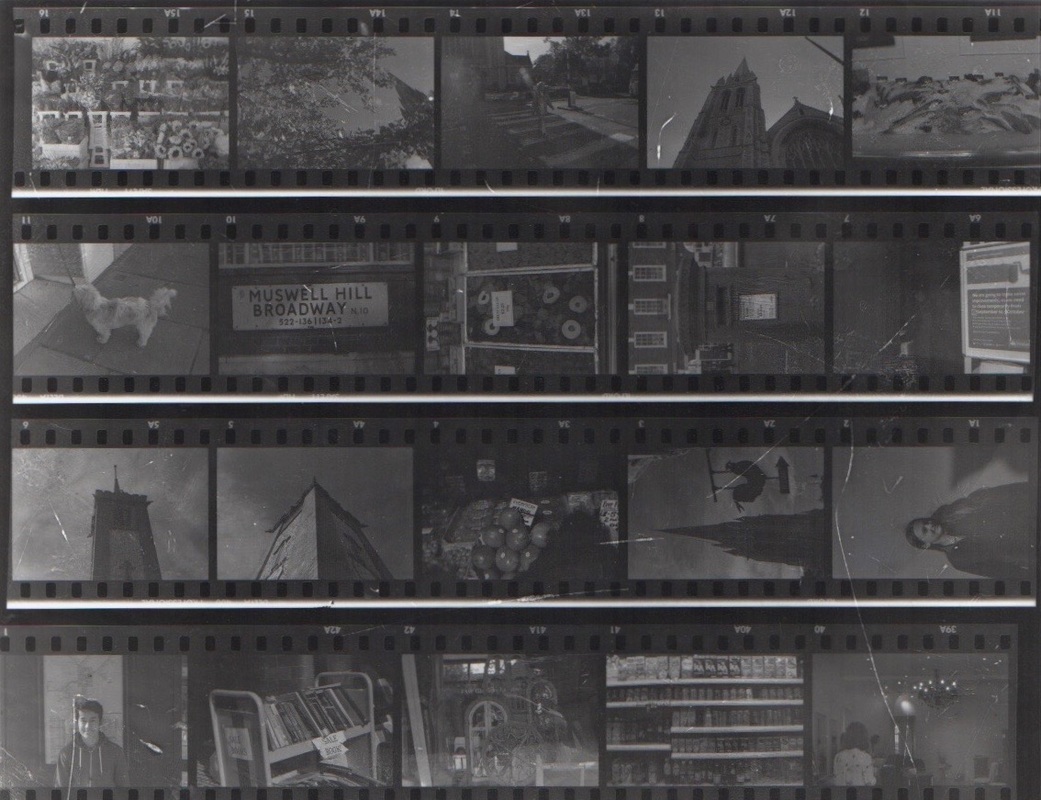
THE CONTACT SHEET & WILLIAM KLEIN
|
You can often learn a lot if you analyse photographers contact sheets. You can explore the journey they took to capture the perfect photograph, you can see when and how they've edited and cropped their photos to create the perfect image. Every photograph has a narrative, and contact sheets are like story boards that map out a the route to the final shot. In addition to this it looking at photographers contact sheets allows you to see what photographs they didn't like and didn't want to include in their work. They are interesting to analyse as you get to see images you wouldn't normally have as they would just get deleted from the final cut. In conclusion contacts sheets allow you too look at a set of photos at a different angle, as the the images are just left as they were taken, |
|
TASK
In class we got given black and white film cameras and our task was to capture 24 photographs that portray a narrative and reflect our local area which is Muswell Hill. Once we had taken our 24 photographs we came back to the dark room to develop our film. Firstly we took our film out of our cameras and in a dark space we placed the film onto film wheels and put them in a light proof tank. Then we developed out film with developer, stop and fix and left our film in the drying cubord. The next day we put our negatives into plastic folders which we used to make contact sheets in the dark room. We did this by first making a test trip of the contact sheet to determine the exposure time. After that we placed the folders on larger photographic paper to develop a contact sheet. Once that was done we used a magnifying glass to pick the photo we wanted to enlarge. Once we had a photograph in mind we placed the negative version of that image into the slot in our enlargers, this would then project our chosen image onto the photographic paper. But before we enlarged our chosen photograph we did a test trip to again determine the correct exposure time.
RESULTS

FINAL IMAGE